
home
Choosing the Right Path: How to Select the Best Home School Curriculum

In today’s rapidly changing educational landscape, many parents are turning to home schooling as a means to provide their children with a personalized and flexible learning experience. The choice of the right home school curriculum is pivotal in shaping a child’s educational journey. It requires careful consideration, thorough research, and a deep understanding of the child’s unique learning needs and family’s educational goals.
The Significance of Curriculum Choice
Home schooling offers the distinct advantage of flexibility, allowing parents to craft an educational experience that caters specifically to their child’s learning style, pace, and interests. This tailored approach often results in a more engaging and effective learning process, which is why the curriculum selection process is of paramount importance.
An Informed Decision
Selecting the ideal home school curriculum is not a hasty decision but a well-informed one. It encompasses a systematic assessment of your child’s learning requirements, the establishment of clear educational objectives, exploration of various curriculum types, thorough research of available resources, and considerations regarding budget constraints. By following this systematic approach, parents can ensure that their child receives a comprehensive and well-rounded education.
Assessing Your Child’s Needs
Recognizing Learning Styles
Each child possesses a unique learning style, which may be predominantly visual, auditory, kinesthetic, or a blend of these. Identifying your child’s primary learning style is instrumental in selecting a curriculum that aligns with their strengths and preferences.
Strengths and Weaknesses
Assess your child’s academic strengths and areas where improvement is needed. A curriculum that addresses these weaknesses while nurturing their strengths is key to a well-rounded education.
Defining Your Educational Goals
Determine your long-term and short-term educational goals for your child. Consider what you want them to achieve academically, emotionally, and socially. Well-defined objectives will serve as guiding principles in your curriculum selection.
Exploring Different Curriculum Types
Traditional vs. Progressive Approaches
Evaluate whether a traditional or progressive educational approach is better suited to your child’s learning style and your educational philosophy. Traditional methods adhere to established educational norms, while progressive approaches often incorporate innovative and experiential learning techniques.
Online vs. Offline Learning
Decide whether an online or offline curriculum aligns better with your family’s lifestyle and your child’s comfort with technology. Both options offer unique advantages and challenges.
Self-Paced vs. Structured Programs
Consider whether your child excels in a self-paced, independent learning environment or thrives in a structured curriculum with defined schedules and deadlines.
Researching Available Resources
Reviewing Curriculum Providers
Extensive research is essential when evaluating curriculum providers, both offline and online. Reading reviews, seeking advice from fellow home schooling parents, and examining curriculum samples provide valuable insights into the content and teaching methodologies.
Online Communities and Reviews
Engaging with online home schooling communities and forums is a treasure trove of information, advice, and reviews from experienced home schooling parents who can offer guidance based on their own experiences.
Consulting Local Home Schooling Associations
Connecting with local home schooling associations or support groups can provide valuable guidance on curriculum options and insight into the legal requirements specific to your region.
Budget Considerations
Evaluating Costs
Determine your budget for home schooling, encompassing curriculum expenses, materials, and resources. Be realistic about what you can afford while keeping an eye on quality.
Balancing Quality and Affordability
Striking a balance between affordability and curriculum quality is crucial. Numerous high-quality home school curricula are available at various price points.
Exploring Financial Assistance Options
Investigate financial assistance options such as scholarships, grants, or subsidies that may be accessible to support your home schooling journey.
Customizing Your Curriculum
Adapting to Your Child’s Needs
Personalization is key in home schooling. Tailor the curriculum to align with your child’s interests and strengths. Incorporating their hobbies and passions makes learning more engaging and relevant.
Incorporating Extracurricular Activities
Consider integrating extracurricular activities such as art, music, sports, or community service to provide a well-rounded education.
Exploring Specialized Subjects
If your child has specific interests or needs, explore specialized subjects or courses to enhance their learning experience.
Trial Period and Adaptation
The Significance of Flexibility
Flexibility is a cornerstone of home schooling. It’s common for families to adjust or change curricula based on their child’s progress and evolving needs.
Monitoring Progress
Regularly assess your child’s progress to ensure they are meeting their educational goals. Be prepared to adjust the curriculum as needed to address any challenges or gaps in learning.
Making Necessary Adjustments
Don’t hesitate to make curriculum adjustments if you find that certain subjects or teaching methods are not effectively resonating with your child. Home schooling offers the flexibility to tailor the educational experience to your child’s unique needs.
Legal Requirements and Regulations
Understanding Home Schooling Laws
Familiarize yourself with the home schooling laws and regulations in your area. Ensure compliance with reporting and record-keeping requirements to meet legal obligations.
Compliance and Record Keeping
Maintain detailed records of your child’s educational activities and accomplishments, as these records may be required for legal purposes.
Seeking Legal Guidance If Needed
In the event of legal challenges or questions related to home schooling, consider seeking legal guidance or consultation from experts well-versed in the field.
Read more information about: The Handy Homeowner’s Manual: Repairing Common Household Appliances
Conclusion
Home schooling is a transformative and highly rewarding educational journey that grants parents the privilege of delivering a personalized and tailored education to their children. By diligently selecting the right home school curriculum, thoroughly assessing the child’s unique needs, articulating clear educational objectives, exploring various curriculum types, and maintaining flexibility, parents can provide a truly enriching and fulfilling educational experience. Always remember that the power to shape your child’s future is firmly within your grasp, and with the right curriculum, you can set them on a path to academic success and personal growth.

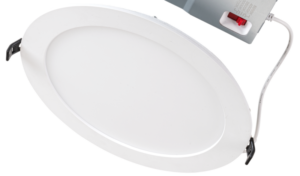
Are you looking to add a touch of modern elegance to your home? Wafer lights are the perfect solution! These sleek and stylish lighting fixtures offer a unique way to brighten up any space. This blog post will guide you through the simple steps to install wafer lights in your home. Say goodbye to boring old light fixtures and hello to a chic new look for your living space.
Introduction to Wafer Lights
Are you looking to brighten your space with a sleek, modern lighting solution? Look no further than wafer lights! These ultra-thin, energy-efficient fixtures are the perfect choice for adding a touch of elegance to any room. This blog post will guide you through installing wafer lights in your home or office. From layout tips to wiring advice, we’ve got you covered. Let’s show how to make your space shine with wafer lights.
Benefits of Installing Wafer Lights
Wafer lights offer a sleek and modern lighting solution that can instantly elevate the ambiance of any space. One key benefit of installing wafer lights is their low-profile design, which allows them to be seamlessly integrated into ceilings without protruding or creating visual clutter. This minimalist approach not only enhances the aesthetics of a room but also creates a clean and streamlined look.
Another advantage of wafer lights is their energy efficiency. These LED fixtures consume less power than traditional lighting, lowering electricity bills and reducing environmental impact. Additionally, wafer lights are known for producing bright and uniform light distribution, providing excellent illumination while maintaining a soft, glare-free glow.
Moreover, wafer lights come in various sizes and color temperatures, allowing customization to suit different preferences and settings. Whether you’re looking to brighten up a kitchen, living room, or office space, wafer lights offer versatility in both design and functionality.
Steps for Accurate Layout of New Light Locations
When installing wafer lights in your home or office, an accurate layout of the new locations is crucial for optimal lighting. Here are the essential steps to follow for a successful installation.
Firstly, measure and mark the location where you want to install the wafer lights. Use a tape measure and a pencil to ensure precise placement on the ceiling or wall.
Next, carefully cut new holes using a drywall or hole saw in the desired locations. Make sure to double-check your measurements before cutting to avoid any mistakes.
After cutting the holes, drill for installation, create space for wiring, and secure the lights in place. Before drilling, consider any electrical wires or obstacles behind the surface.
By following these steps accurately, you can ensure that your wafer lights are installed precisely and efficiently.

Measuring and Marking the Location
Measuring and marking the location of your wafer lights is a crucial first step in ensuring a seamless installation process. Start by determining the exact placement of your new lights. Use measuring tape to accurately measure the distance from nearby walls or ceilings.
Once you have identified the precise locations, use a pencil or chalk to mark these spots on the ceiling. Ensure that your markings are clear and easily visible, as they will serve as guides during the cutting and drilling stages of installation.
Double-check your measurements before proceeding further to avoid errors or misalignments later. Taking time with this step is essential to guarantee that your wafer lights are placed exactly where you envision them shining brightly in your space.
By taking care with measuring and marking, you set yourself up for success in creating a well-lit environment that complements both form and function seamlessly.
Cutting New Holes
Cutting new holes in the ceiling is crucial in installing wafer lights. Before cutting into your ceiling, measure and mark the precise locations where you want to place the lights. This will ensure they are evenly spaced and positioned according to your preferences.
Once you have marked the spots for the new holes, use a suitable tool, such as a drywall or hole saw, to carefully cut through the ceiling material. Take your time with this step to avoid any unnecessary damage or mistakes. It’s important to make clean and precise cuts for a professional-looking finish.
Before making any cuts, double-check that no electrical wires or plumbing pipes are running through the area where you plan to install the wafer lights. Safety should always be a top priority during this process.
After cutting out the holes, remove any debris or excess material around the edges for a clean installation. Before drilling and wiring each light fixture, follow manufacturer instructions on sizing and spacing requirements.
Drilling for Installation
Drilling is crucial in installing wafer lights, ensuring a seamless and professional finish. Before starting the drilling process, ensure you have measured and marked the locations where the lights will be installed. This precision will prevent any mistakes or uneven placements.
Using a drill bit that matches the size of your wafer lights is essential to create clean and precise holes in your ceiling or wall. Take your time when drilling to avoid splintering or damaging the surface.
Use appropriate safety gear while drilling, such as goggles, to protect your eyes from debris. Additionally, always double-check the dimensions of the holes before proceeding with installation.
By taking care during this step, you can ensure that your wafer lights are securely installed and provide optimal lighting for your space.
Tips for Wiring Wafer Lights
A few tips can help ensure a smooth installation process when wiring wafer lights.
First, make sure to carefully read the manufacturer’s instructions before starting. This will provide you with specific guidance on correctly wiring the lights.
Next, always turn off the power source before attempting any wiring work. Safety should be your top priority when dealing with electrical components.
Consider using wire connectors or junction boxes for a clean and secure connection. This will help prevent any issues down the line.
Lastly, double-check your wiring connections before turning the power back on to avoid potential hazards or malfunctions. Taking these precautions can save you time and frustration in the long run.
Common Mistakes to Avoid When Installing Wafer Lights
Many DIY enthusiasts might make a few common mistakes when installing wafer lights. One of the most prevalent errors is not measuring accurately before cutting new holes for installation. This can lead to unevenly placed lights and a less polished overall look.
Another mistake to avoid is rushing through the drilling process. Taking time and ensuring the holes are drilled in the right locations is crucial for a seamless installation. Additionally, overlooking proper wiring techniques can cause issues down the line, so be sure to follow instructions carefully and double-check your connections.
Lastly, neglecting safety precautions when working with electricity is a big no-no. Always turn off power sources before beginning work and use insulated tools for added protection. By avoiding these common mistakes, you can always ensure a successful wafer light installation project.
Alternative Options to Consider
Wafer lights are a fantastic option for lighting up your space due to their sleek design and energy efficiency. However, a few alternatives are worth exploring.
One alternative is track lighting, which offers flexibility in directing light where you need it most. With adjustable heads along a track, this option allows for customizable illumination in various areas of your room.
Another option to consider is pendant lighting. These hanging fixtures can add a touch of style and personality to your space while providing ample light. Pendant lights come in various shapes and sizes, making them versatile for different rooms and decor styles.
For a more modern look, recessed lighting could be the solution. Recessed lights blend seamlessly into the ceiling, offering a minimalist aesthetic while still effectively illuminating the room.
Each alternative provides unique benefits that cater to different preferences and needs when lighting your home or office space.
Read more about it here: Penthouse Hub: The Epitome of Sky-High Elegance
Conclusion:
Properly installing wafer lights is crucial for maximizing their benefits and ensuring they function effectively. Following the steps outlined in this guide, you can accurately lay out new light locations, wire them correctly, and avoid common installation mistakes. Remember that alternative options like retrofit kits are available if needed.
Ultimately, the importance of properly installing wafer lights cannot be overstated. Doing so enhances your space’s aesthetics and roves energy efficiency and overall quality. So take your time, follow these guidelines meticulously, and enjoy the advantages of well-installed wafer lights in your home or office.

Looking to elevate your culinary experience with a new cutting board but unsure which material is best? Look no further than acacia wood! Known for its durability, beautiful grain patterns, and sustainability, acacia wood has become a popular choice for kitchen essentials. In this blog post, we’ll dive into the reasons why acacia wood is an excellent option for cutting boards and explore how it compares to other materials on the market. Let’s chop our way through the facts and find out if acacia wood is perfect for a cutting board.
Introduction to the topic of using wooden cutting boards
Welcome to the wonderful world of wooden cutting boards – where functionality meets beauty in the heart of your kitchen! Choosing the right type of wood for your cutting board is essential for both its performance and aesthetics. Today, we’re diving into the realm of acacia wood, a popular choice among home chefs and culinary enthusiasts alike. Let’s explore why acacia wood may just be the perfect match for your chopping and slicing needs.
Explanation of the importance of choosing the right type of wood for a cutting board
When it comes to selecting the perfect cutting board for your kitchen, the type of wood you choose plays a significant role in both functionality and durability. Different woods offer varying levels of hardness, density, and grain patterns that can affect how well they hold up to daily use.
Choosing the right type of wood ensures that your cutting board will withstand knife cuts without prematurely dulling them or harboring bacteria in deep grooves. The quality of the wood also impacts how easy it is to maintain and keep clean over time.
Acacia wood, known for its strength and beautiful grain patterns, has become a popular choice among home chefs for its durability and resistance to water damage. Its natural oils help protect against moisture absorption while providing a sturdy surface for all your shopping needs.
Opting for acacia wood means investing in a long-lasting cutting board that not only looks great but also performs exceptionally well during meal preparations.

Brief overview of acacia wood and its properties
Acacia wood comes from the fast-growing acacia tree, known for its durability and beautiful grain patterns. It is a hardwood that is naturally resistant to water damage and warping, making it an excellent choice for cutting boards. The hardness of acacia wood allows for a sturdy surface that can withstand the rigors of daily use in the kitchen.
What sets acacia wood apart is its natural antibacterial properties, which help prevent bacterial growth on the cutting board. This feature makes it a hygienic option for food preparation. Additionally, acacia wood has a rich golden color with unique variations in each piece, adding a touch of elegance to your kitchen.
Another notable property of acacia wood is its sustainability. Acacia trees are abundant and proliferate, making them an eco-friendly choice for those looking to reduce their environmental impact. Overall, acacia wood combines functionality with aesthetics, making it an ideal material for cutting boards in any kitchen setting.
Benefits of using acacia wood for a cutting board
Acacia wood is a top choice for cutting boards due to its durability and natural antibacterial properties. Its tight grain structure helps resist knife scars, keeping your board looking pristine for longer periods. Acacia wood is also restored extended to water damage, reducing the likelihood of warping or cracking over time.
Acacia wood is durable, beautiful, and has unique grain patterns that add an aesthetic touch to any kitchen. Each piece is distinct, making every cutting board one-of-a-kind. Its medium hardness provides the perfect balance between toughness and gentleness on knives, ensuring longevity for both your board and blades.
Moreover, acacia wood is eco-friendly, as it comes from sustainable sources. Choosing an acacia wood-cutting board benefits you in the kitchen and supports responsible forestry practices. Enjoy the practicality and beauty of acacia wood in your culinary adventures.
Comparison with other popular types of wood for cutting boards
When it comes to choosing the perfect wood for your cutting board, acacia wood stands out among other popular options like bamboo and maple. Acacia wood is known for its durability and resistance to moisture, making it an ideal choice for a kitchen essential that will last a long time.
While bamboo cutting boards are also durable, they can be harder on knives due to their density. Maple, on the other hand, is a classic choice but may require more maintenance compared to acacia wood.
Acacia wood’s natural oils help protect it from water damage and stains, making it easier to maintain over time. Additionally, its distinctive grain patterns add a touch of elegance to your kitchen decor.
In terms of sustainability, acacia wood is considered more eco-friendly than bamboo as it grows faster and requires less water during cultivation. When weighing all these factors together, acacia wood emerges as a top contender in the realm of cutting board materials.

Tips on how to properly care for an acacia wood-cutting board
Regular maintenance is key to keeping your acacia wood-cutting board in good condition; regular maintenance is critical. Start with water after each use and dry it thoroughly to prevent warping. Avoid soaking the board or putting it in the dishwasher, as this can cause damage over time.
To maintain its natural beauty, apply a food-safe mineral oil or beeswax regularly to nourish the wood and protect it from moisture. This will also help prevent cracking and prolong the lifespan of your cutting board. Be sure to rub in the oil evenly and let it absorb before using the board again.
When storing your acacia wood cutting board, make sure it is placed on a flat surface to avoid any bending or warping. Additionally, store it away from direct sunlight or heat sources, which can dry out the wood and lead to cracks.
By following these simple tips, you can ensure that your acacia wood cutting board remains a durable and beautiful kitchen essential for years to come.
Common misconceptions about acacia wood and their debunking
Let’s address some common misconceptions about acacia wood that may have you questioning its suitability for a cutting board. One misconception is that acacia wood is too complicated and will dull your knives quickly. In reality, while it is durable, acacia wood has a balanced hardness that allows for knife-friendly usage without excessive wear.
Another myth surrounding acacia wood is that it requires high maintenance to keep in good condition. Contrary to this belief, acacia wood cutting boards are relatively low-maintenance compared to other types of wood. Regular oiling and proper cleaning can easily preserve the board’s beauty and integrity.
Some may also believe that acacia wood harbors more bacteria than plastic cutting boards. However, studies have shown that wooden surfaces like acacia naturally possess antimicrobial properties, making them hygienic choices for food preparation areas.
It’s essential to separate fact from fiction when considering using an acacia wood cutting board in your kitchen. By understanding the truth behind these misconceptions, you can confidently enjoy the benefits of this beautiful and functional material in your culinary routine.
Read more about it here: Innovative Granite Countertop Ideas for Denver Homes
Conclusion:
In conclusion, acacia wood is an excellent choice for a cutting board due to its durability, natural beauty, and sustainability. Its hardness and resistance to moisture make it a reliable option for everyday use in the kitchen. When properly cared for, an acacia wood cutting board can last for years, providing a safe and hygienic surface for food preparation.
So, if you’re looking for a high-quality cutting board that not only looks great but also performs well, consider investing in one made from acacia wood. This versatile and eco-friendly material will surely enhance your culinary experience.
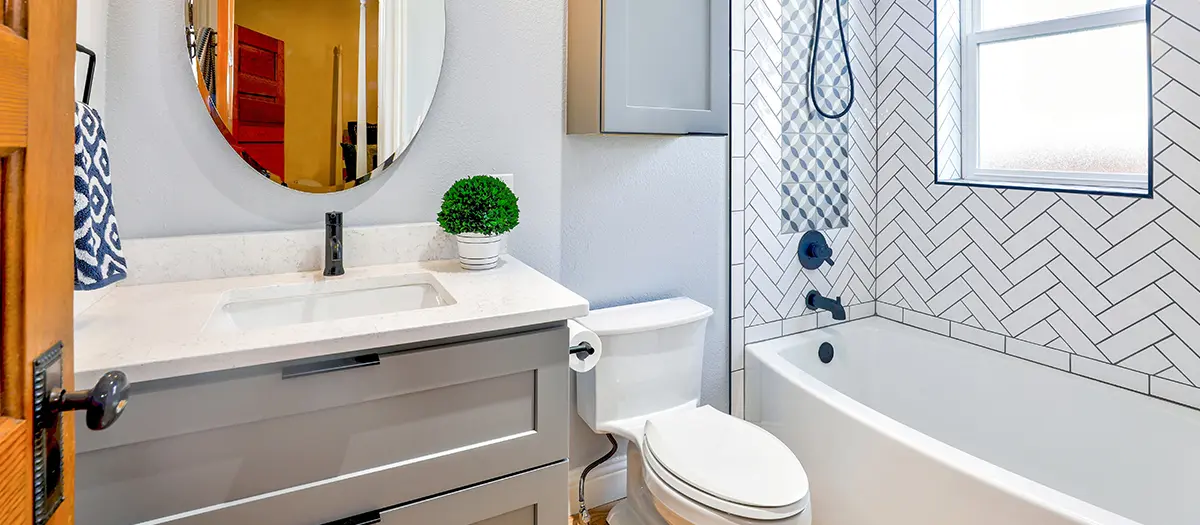
Your home is not just a place where you live; it’s a sanctuary that reflects your personal style, comfort, and the way you experience life’s daily routines. Among all the spaces within your home, the bathroom and kitchen stand out as the core areas where functionality meets personal taste. Renovating these spaces can significantly elevate your home’s comfort, style, and overall value. Let’s explore the myriad benefits that come with upgrading your bathroom and kitchen.
A Fresh Start: Redefining Comfort and Elegance
The Heart of the Home: Reinventing Your Kitchen
The kitchen is often considered the heart of the home, a gathering place for family and friends. A renovation can transform this essential space into a more functional, efficient, and aesthetically pleasing area. By introducing modern appliances, optimizing storage with custom cabinetry, and installing durable and easy-to-clean countertops, you can create a kitchen that not only looks beautiful but also enhances your cooking and dining experience.
A Personal Retreat: Upgrading Your Bathroom
Your bathroom should be a personal retreat, a space where you can relax and rejuvenate. Renovating your bathroom offers the chance to incorporate modern luxuries, such as a walk-in shower with rainfall showerheads, a deep soaking tub, and heated floors, turning everyday routines into spa-like experiences. Updating fixtures, lighting, and ventilation can also improve functionality and energy efficiency, making your bathroom more comfortable and inviting.
Enhanced Functionality and Efficiency
Smart Storage Solutions
Both kitchen and bathroom renovations provide an excellent opportunity to improve storage and organization. Custom cabinets, shelving, and innovative storage solutions can help minimize clutter and maximize space, making these areas more functional and easier to navigate.
Energy Efficiency and Sustainability
Upgrading appliances and fixtures to more energy-efficient models not only reduces your carbon footprint but also leads to significant savings on utility bills. Sustainable materials like bamboo flooring or recycled glass countertops can also enhance the eco-friendliness of your home.
Increased Home Value
Investing in bathroom and kitchen renovations can offer a substantial return on investment by increasing your home’s market value. These upgrades are among the most sought-after features for homebuyers, making your property more attractive should you decide to sell. Even if you’re not planning to sell, these renovations can significantly enhance your living environment, contributing to a sense of accomplishment and pride in your home.
Personalized Style and Aesthetics
Renovating allows you to tailor your bathroom and kitchen to reflect your personal style and preferences. Whether you’re drawn to a sleek, modern design with clean lines and high-tech features or a cozy, traditional look with warm woods and classic fixtures, a renovation can transform these spaces to match your vision. This personalization extends beyond mere aesthetics, allowing you to create a space that feels uniquely yours.
Read more information about here: Complete Guide to GarnetHillsKids.com: Where Kids Fashion Meets Fun
Conclusion
Renovating your bathroom and kitchen is more than just an upgrade; it’s an investment in your home’s future and your quality of life. These improvements can bring about a profound transformation, turning everyday spaces into sources of comfort, style, and efficiency. By elevating these essential areas, you not only enhance your daily living experience but also invest in the long-term value and appeal of your home. Whether you’re looking to sell in the future or simply want to enjoy a more beautiful and functional living space, bathroom and kitchen renovations offer compelling benefits that are hard to overlook.
-

 Business7 months ago
Pikruos.com: Your Premier Destination for Creative Visuals
-

 Blog8 months ago
Guia Silent Hill Geekzilla: Your Ultimate Guide
-

 health5 months ago
What is Pollaste? Review Details
-

 Education7 months ago
Tickzoo.info: Your Go-To Guide for Trending Topics and Information
-

 Technology8 months ago
Elevating Your Data Game with SSIS 816
-

 Education7 months ago
Diving into the Forbidden: Kristen Archives Taboo Collection
-

 Blog6 months ago
Complete Insights About The Topic in Gloriando 2024
-

 health8 months ago
Empowering Your Well-being with TheAPKNews.Shop Health Insights